Table of Contents
The Initial Consultation: Bringing Dreams to Life
So, you’re engaged! Congrats! Now comes the fun part, well, one of the fun parts anyway, finding your dream wedding dress. But where do you even start? You can find here How to choose Pakistani wedding dress guide. Well, most brides kick off their dress journey with an initial consultation at a bridal boutique or with a designer. And let me tell you, it’s not just about trying on dresses, it’s like a therapy session, a fashion show, and a brainstorming meeting all rolled into one.
- Setting the Scene: Picture this: you walk into the boutique, maybe with your mom, your best friend, or your whole squad. There’s champagne (because why not?), there are comfy seats, and there are dresses, so many dresses. It’s like walking into a cloud of white fabric and sparkles. The consultant or designer will sit you down and start asking questions. And I’m not talking about your basic “what’s your favorite color” kind of questions. They want to know everything. What’s your venue like? Beach wedding or ballroom? What season? What time of day? Are you more Meghan Markle elegant or Gwen Stefani funky? They’re trying to get inside your head and figure out what your dream dress looks like, even if you don’t know yet yourself.
- Pinterest Boards and Magazine Clippings: Now, if you’re like most brides, you’ve probably been pinning dress ideas since before you even met your fiancé (no judgment here!). This is the time to whip out that Pinterest board or those magazine clippings you’ve been hoarding. The consultant will look through them and start to get a feel for your style. Maybe you’re all about lace, or you’re obsessed with big princess ballgowns, or you’re into sleek, modern silhouettes. Whatever it is, they’re piecing together the puzzle of your perfect dress.
- Try-On Time: After all the talking and looking at pictures, it’s time for the fun part: trying on dresses! Now, don’t freak out if the first dress you try on isn’t “the one.” In fact, it probably won’t be. This part of the process is all about figuring out what you like and, just as importantly, what you don’t like. Maybe you thought you wanted a mermaid style, but once you try it on, you realize you can’t walk. Or maybe you were dead set against strapless, but then you try one on and suddenly you’re in love. It’s all part of the journey. The consultant will bring you different styles, different fabrics, different necklines. It’s like playing dress-up, but way more fancy and with a lot more pressure.
Sketching the Vision: Putting Ideas on Paper
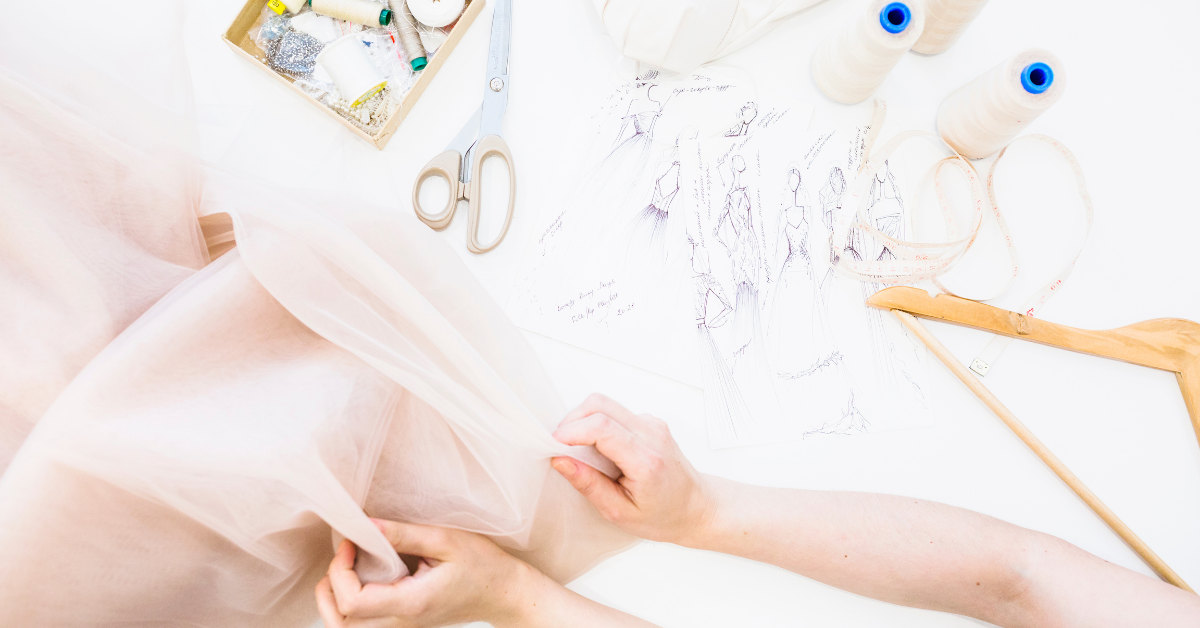
Okay, so you’ve tried on a bunch of dresses, you’ve got a pretty good idea of what you like and what you don’t. Now comes the really cool part: turning all those ideas into an actual design. If you’re working with a designer (and even some boutiques do this now), they’ll start sketching out your dream dress. It’s like magic, watching your ideas come to life on paper.
- The Designer’s Magic Touch: Now, don’t expect a perfect, ready-for-the-runway sketch right off the bat. The first sketches are usually pretty rough, just getting the basic shape and feel of the dress down. The designer might do a few different versions, playing with different necklines or skirt shapes. It’s all about options at this point. They might sketch a dress with sleeves and without, or with a train and without. It’s like creating a whole wardrobe of potential dream dresses, just for you.
- Your Input Matters: Here’s the thing: this is your dress. So don’t be shy about giving your opinion. If you love something in the sketch, say so. If something’s not quite right, speak up. Maybe you love the bodice of one sketch but the skirt of another. The designer can mix and match, creating a Frankenstein’s monster of a dress that’s perfectly you. And don’t worry if you can’t articulate exactly what you want. Designers are like dress psychics, they can usually figure out what you mean even if you’re just making vague hand gestures and saying things like “more poofy” or “less shiny.”
- Refining the Design: Once you’ve given your feedback, the designer will refine the sketch. This might happen a few times, tweaking little details here and there until it’s just right. They might add more detail to the sketch, showing the beading or lace placement. It’s like watching your dress evolve right before your eyes. And the best part? At the end of this process, you’ll have a sketch of your dream dress that you can keep forever. It’s like a blueprint of your wedding day look.
Choosing Fabrics: The Foundation of the Dress
Alright, now we’re getting into the nitty-gritty. You’ve got your design, but now you need to decide what it’s going to be made of. Choosing fabrics is like picking the ingredients for a recipe. Get it right, and you’ve got a masterpiece. Get it wrong, and well, let’s just say not even the best design can save a dress made from the wrong fabric.
- The Fabric Buffet: When you start looking at fabrics, it’s like being a kid in a candy store, but instead of sweets, it’s all silks and laces and tulles. There are so many options it can make your head spin. You’ve got your classic bridal satin, smooth and shiny. There’s chiffon, light and floaty. Organza, which is like chiffon’s slightly stiffer cousin. And don’t even get me started on lace. There are more types of lace than there are flavors of ice cream, I swear. Alençon, Chantilly, guipure, each with its own unique pattern and feel. It’s enough to make you want to just wrap yourself in a bolt of fabric and call it a day.
- Feel is Everything: Here’s a pro tip: don’t just look at the fabrics, feel them. Rub them between your fingers, drape them over your arm. How does it feel against your skin? Remember, you’re going to be wearing this dress all day (and dancing in it all night). You want something that feels good. A fabric might look amazing, but if it’s itchy or stiff, you’re going to be miserable. And trust me, no bride wants to be scratching herself in all her wedding photos.
- Consider the Big Picture: When choosing fabrics, you’ve got to think about the big picture. What’s your venue like? If you’re having a beach wedding, a heavy satin might not be the best choice. Getting married in December? Maybe skip the ultra-sheer chiffon. The fabric needs to work with your design, your body, and your wedding setting. It’s like putting together a puzzle, but all the pieces are really pretty and probably expensive.
- Mixing and Matching: Don’t feel like you have to stick to just one fabric. In fact, most wedding dresses use a combination of fabrics. You might have a satin base with a lace overlay, or a chiffon skirt with a beaded bodice. Mixing fabrics can add depth and interest to your dress. It’s like creating a textile work of art, and you’re the canvas.
The First Fitting: Making the Muslin
This is where things start to get real. You’ve got your design, you’ve picked your fabrics, and now it’s time for your first fitting. But hold up, don’t expect to see your gorgeous dress just yet. Nope, for this fitting, you’re probably going to be trying on something called a muslin. And let me tell you, it’s not exactly the stuff of bridal dreams.
- What the Heck is a Muslin?: A muslin is basically a rough draft of your dress. It’s usually made from, you guessed it, muslin, which is a plain, inexpensive cotton fabric. Now, I’m not going to sugarcoat it, when you first see your muslin, you might have a moment of panic. It’s not pretty. It’s usually a dull off-white color, there are no embellishments, and it’s probably held together in some places with pins or basting stitches. It’s like seeing a house when it’s just wooden frames, no walls, no paint, no fancy light fixtures. But trust me, this ugly duckling stage is crucial.
- The Purpose of the Muslin: The muslin serves a few important purposes. First, it lets the designer or seamstress check the fit of the dress without wasting any of that expensive fabric you chose. They can make adjustments, pin things, even cut into the muslin if they need to, all without any risk to your actual dress. Second, it gives you a chance to see the basic shape of your dress on your body. This is when you might realize that the neckline you thought you wanted doesn’t actually look that great on you, or that the waistline needs to be a little higher or lower. It’s like a dress rehearsal, but for your dress.
- Making Adjustments: When you’re trying on the muslin, the seamstress or designer will be pinning and marking and making all sorts of adjustments. They might ask you to move around, sit down, maybe do a little dance. They want to make sure the dress fits well and that you can actually move in it. Because let’s face it, a dress that looks amazing but that you can’t walk in isn’t going to do you much good when it’s time to walk down the aisle. This is also your chance to speak up if something doesn’t feel right. Maybe the sleeves are too tight, or the bodice is too long. Now’s the time to say something, because changes are much easier to make at this stage.
- Visualizing the Final Product: Now, I know what you’re thinking. “How am I supposed to know if I like the dress when it looks like this?” And I get it, it’s hard to see past the plain fabric and the pins. But this is where you’ve got to use your imagination. Try to picture it in the beautiful fabric you chose, with all the lace and beading and whatever other pretties you’ve planned. The muslin is like the skeleton of your dress, and your job is to imagine it with flesh and skin and a pretty face. It’s not easy, but it’s an important part of the process. And hey, if nothing else, it makes the final reveal of your actual dress that much more exciting!
Embellishments and Details: Adding the Wow Factor
Alright, now we’re getting to the fun part. Your dress has a shape, it fits (more or less), and now it’s time to make it sparkle. Literally. This is the stage where your dress goes from “nice white dress” to “OMG that’s a wedding dress!” It’s all about the embellishments and details that make your dress uniquely yours.
- Lace, Beads, and Bling: First up, let’s talk about lace. If you’re using lace in your dress (and let’s face it, most wedding dresses have at least some lace), this is when it gets applied. And it’s not just slapped on there, oh no. Good lace application is an art form. The seamstress will carefully cut and place the lace to follow the contours of your dress, making sure the patterns line up in all the right places. It’s like a very intricate, very expensive jigsaw puzzle. Then there’s beading. Beads, sequins, crystals, these are what make your dress sparkle and shine. They can be used to create patterns, to highlight certain areas of the dress, or just to add an all-over shimmer. And let me tell you, this is not a quick process. Each of those tiny beads is sewn on by hand. It’s like painting the Sistine Chapel, but with teeny tiny sparkly bits.
- Buttons, Bows, and Other Pretty Things: But embellishments aren’t just about the sparkly stuff. There are all sorts of other details that can be added to make your dress special. Maybe you want covered buttons down the back (a classic look that never goes out of style). Or perhaps you’re into a big dramatic bow (very princess-y). Some brides opt for delicate appliqués, others go for dramatic embroidery. The options are endless, and this is where you can really let your personal style shine through. Want a hidden Mickey somewhere on your dress for your Disney-loving heart? This is the time to do it. Always dreamed of a dress with pockets? (Because who doesn’t love a dress with pockets?) Now’s your chance.
- The Devil’s in the Details: Here’s the thing about embellishments and details: they can make or break a dress. Too little, and your dress might look plain. Too much, and you risk looking like a disco ball (unless that’s the look you’re going for, in which case, shine on you crazy diamond). It’s all about finding the right balance. A good designer or seamstress will know how to add just the right amount of detail to enhance your dress without overwhelming it. They’ll consider things like where the beading should be heaviest, how the lace should be placed to flatter your figure, where a well-placed bow or flower can add just the right touch. It’s like accessorizing, but on a whole other level.
- Your Input Matters: Just like with every other stage of this process, your opinion matters here. If you think there’s too much bling, say so. If you want more lace, speak up. This is your dress, and it should be exactly what you want. Don’t be afraid to ask for what you want, even if it seems a little out there. Want a hidden message embroidered somewhere on the dress? Ask for it. Dream of a detachable skirt that turns your ballgown into a party dress for the reception? Make it happen. This is your chance to create the dress of your dreams, so dream big!
The Construction Process: Bringing the Dress to Life
Okay, now we’re really getting into the nitty-gritty. This is where your dress starts to actually look like, well, a dress. The construction process is like watching a butterfly emerge from its cocoon, except instead of a butterfly, it’s the most important garment you’ll ever wear. No pressure, right?
- Laying the Foundation: First things first, the seamstress or dressmaker will start with the foundation of your dress. This usually means creating the bodice, which is like the skeleton of your dress. They’ll use the pattern they created from your muslin fitting, cutting out the pieces from your chosen fabric. And let me tell you, watching someone cut into that expensive fabric you chose can be a little nerve-wracking. It’s like watching someone do surgery, but on your dreams. But don’t worry, these people know what they’re doing. They’ll handle that fabric like it’s made of gold.
- Putting the Pieces Together: Once all the pieces are cut out, it’s time to start putting them together. This is where the magic really happens. The seamstress will carefully sew each piece, creating the shape of your dress. They’ll add boning to the bodice if your dress calls for it (this is what gives structure and support), attach the skirt, add sleeves if you’re having them. It’s like a very fancy, very expensive game of dress-up. And the attention to detail at this stage is incredible. Every seam has to be perfect, every dart precisely placed. It’s the kind of work that makes you appreciate why wedding dresses cost what they do.
- Adding Structure: Now, depending on the style of your dress, there might be some additional structure added at this stage. If you’re going for a big princess ballgown, this is when they’ll add the petticoat or crinoline that gives the skirt its shape. If your dress has a train, they’ll work on getting that to fall just right. It’s all about creating the silhouette you want. And let me tell you, watching your dress take shape is pretty amazing. It’s like seeing a sketch come to life.
- The Nitty Gritty Details: This is also when a lot of the smaller details get added. Zippers, hooks, eyes, all the bits and pieces that hold your dress together and let you get in and out of it. And trust me, there’s a lot more engineering involved in this than you might think. They have to make sure you can actually get into the dress (and out of it at the end of the night), while still keeping everything secure. Nobody wants a wardrobe malfunction on their wedding day!
- Quality Control: Throughout this whole process, there’s a lot of checking and double-checking going on. The seamstress will be constantly trying the dress on a dress form, making sure everything is falling the way it should. They’ll be examining every seam, every stitch, making sure everything is perfect. It’s like quality control, but for the most important garment of your life. And the level of craftsmanship that goes into this is just incredible. These people are artists, really. They’re creating a wearable work of art, just for you.
- The Exciting Part: Now, here’s the really exciting part: at some point during this process, you’ll start to see your dress taking shape. It might not be finished yet, but you’ll be able to see the basic structure, the silhouette, maybe even some of the details. It’s like watching your dream slowly become reality. And let me tell you, it’s a pretty amazing feeling. This is when it really starts to hit home that you’re getting married, that this is really happening. It’s enough to give you butterflies in your stomach (the good kind, not the “oh no, what have I done” kind).
Final Fittings: Perfecting the Fit
Alright, we’re in the home stretch now. Your dress is mostly constructed, the basic shape is there, and now it’s time for the final fittings. This is where we make sure your dress fits you like a glove, or like it was painted on, or whatever other metaphor you want to use for “fits really, really well.”
- The Process: You’ll probably have a few fittings at this stage. At each one, you’ll try on your dress (which is looking more and more like a real wedding dress with each fitting), and the seamstress will pin and mark and adjust. They’ll be looking at things like how the dress falls, whether the hem is even, if the bodice is sitting right. It’s like fine-tuning an instrument, but the instrument is your dress and the music is how amazing you’re going to look on your wedding day.
- Speak Now or Forever Hold Your Peace: This is your last chance to make any changes, so if there’s anything you’re not happy with, now’s the time to speak up. Maybe the neckline isn’t quite right, or you’ve decided you want a bit more bling. Don’t be afraid to say something. Remember, this is your dress, and it should be exactly what you want. The seamstress would much rather make changes now than have you be unhappy on your wedding day.
- The Little Details: This is also when a lot of the little details get finalized. Things like where exactly the bustle will be attached if you’re having one (and trust me, if you’ve got a train, you want a bustle for the reception unless you plan on dragging your dress around all night). They might add the “something blue” if you’re doing that tradition. Maybe you want a special date or message sewn into the dress. All these little personal touches happen now.
- The Final Countdown: As you get closer to your wedding day, the fittings will get more frequent. The last fitting is usually just a week or two before the big day. This is to make sure that everything is perfect and that your dress fits you exactly right. And let me tell you, when you put on your dress at that last fitting and everything is just right, it’s a pretty magical moment. It’s like, “Wow, this is really happening. I’m really getting married. In this dress. That was made just for me.” It’s enough to make even the most chill bride get a little emotional.
The Big Reveal: Seeing the Finished Dress
This is it. The moment you’ve been waiting for. Your dress is done, it’s perfect, and it’s time for the big reveal. It’s like Christmas morning, your birthday, and winning the lottery all rolled into one.
- Setting the Scene: Usually, this happens at your final fitting. You’ll go to the boutique or the designer’s studio, and there it’ll be. Your dress. Finished. Perfect. Probably on a hanger or a dress form, looking all gorgeous and bridal. And let me tell you, seeing your dress for the first time, all finished and ready to go, is a moment you’ll never forget. It’s like seeing all your wedding dreams come to life in fabric form.
- Trying It On: Of course, you don’t just look at it. You’ve got to try it on. And this is where the waterworks usually start. (Pro tip: wear waterproof mascara to your final fitting. Trust me on this.) Stepping into your finished dress, having it zipped or buttoned up, and then turning to look in the mirror… well, it’s pretty darn special. This is the dress you’re going to get married in. The dress you’ll wear as you walk down the aisle, say your vows, have your first dance. It’s not just a dress anymore, it’s a symbol of this huge life change you’re about to make.
- The Reactions: If you’ve brought along your mom, or your maid of honor, or whoever your dress shopping buddy has been, get ready for some reactions. There might be tears (happy ones!), there will definitely be oohs and aahs. It’s like your own personal red carpet moment. Everyone will want to look at all the details, to see how it moves when you walk, to watch you twirl (because you’re definitely going to want to twirl in this dress).
- The Final Checks: Even though this is the “big reveal,” the seamstress will still be checking everything. They’ll make sure the dress fits perfectly, that you can move comfortably, that everything is laying just right. They might make a few tiny adjustments, but at this point, it’s all about the finishing touches.
- Taking It Home: And then, finally, it’s time to take your dress home. They’ll carefully pack it up for you, usually in a special garment bag to keep it safe. And just like that, you’re walking out with your wedding dress. It’s a pretty surreal moment. You’ve gone from a vague idea of what you want, through sketches and fittings and decisions about fabric and beading, and now you’ve got the real thing. Your wedding dress. Ready for your big day.
Preserving the Memory: Caring for the Dress After the Wedding
Okay, so you’ve worn the dress, you’ve danced the night away, you’ve got a million amazing photos. Now what? Well, if you’re like most brides, you probably want to keep your dress as a memento of your special day. But you can’t just shove it in the back of your closet and hope for the best. Here’s how to make sure your dress stays as beautiful as the day you wore it.
- The Immediate Aftermath: First things first, don’t just ball up your dress and toss it in the corner when you get home from your wedding (or your honeymoon, if you’re jetting off right away). I know you’re probably exhausted and maybe a little hungover, but trust me, future you will thank present you for taking care of this. If you can, hang the dress up somewhere safe. If it’s got a long train, try to spread it out so it’s not all crumpled up.
- Professional Cleaning: As soon as you can after the wedding, get your dress professionally cleaned. And I’m not talking about your regular dry cleaner. Look for a specialist who deals with wedding gowns. They know how to handle delicate fabrics and intricate beadwork. They’ll be able to get out any stains (because let’s face it, between the champagne toasts and the dance floor, there’s bound to be a spill or two) without damaging the dress. The sooner you can do this, the better. Stains that are left to set can be much harder to remove.
- To Preserve or Not to Preserve: Once your dress is clean, you’ve got a decision to make. Do you want to have it professionally preserved, or are you happy to just store it yourself? Professional preservation usually involves sealing the dress in an airtight container with special acid-free tissue paper. This helps prevent yellowing and keeps the fabric in good condition. It’s a good option if you’re planning to keep the dress for a long time, maybe to pass down to a future daughter or just as a keepsake.
- DIY Storage: If you decide to store the dress yourself, there are a few things to keep in mind. First, don’t store it in plastic. That can trap moisture and lead to mold or mildew. Instead, use a cloth garment bag or wrap it in unbleached muslin. Store it somewhere cool and dry, away from direct sunlight (which can fade the fabric). And whatever you do, don’t hang it by the shoulders for long-term storage. The weight of the dress can distort the shape over time. Instead, fold it carefully and store it flat if you can.
- Future Uses: Now, you might be thinking, “Why go to all this trouble? I’m never going to wear it again.” And maybe you won’t. But you might want to use parts of it someday. Some brides use fabric from their dress to make a christening gown for their future children, or incorporate pieces into a wedding day outfit for their daughter. Or maybe you’ll just want to take it out every now and then to reminisce about your special day. Whatever the reason, taking good care of your dress now means you’ll have options in the future.
- The Emotional Value: At the end of the day, your wedding dress is more than just a piece of clothing. It’s a symbol of one of the most important days of your life. It’s a tangible reminder of the moment you said “I do,” of the love and joy you felt on your wedding day. So even if it spends most of its time packed away, knowing it’s there, preserved and protected, can be really special. It’s like having a little piece of your wedding day that you can keep forever.
FAQs:
How long does the whole dress-making process usually take?
The process can take anywhere from 6 to 12 months, depending on the complexity of the dress and the designer’s schedule. It’s best to start shopping about a year before your wedding date.
What if I lose or gain weight during the process?
Most dresses are made with a bit of wiggle room for small weight fluctuations. For significant changes, additional alterations may be needed closer to the wedding date.
Can I make changes to the design once the process has started?
Minor changes are usually possible, but major alterations might be challenging or costly once construction has begun. It’s best to finalize your design before cutting begins.
How many fittings will I need?
Typically, you’ll have 3-5 fittings, but this can vary depending on the dress and any necessary adjustments.
What should I bring to my fittings?
Bring the undergarments and shoes you plan to wear on your wedding day. This ensures the dress will fit perfectly with your complete look.
Is it possible to add pockets to my wedding dress?
Yes! Many designers can add pockets to your dress if you request them early in the process.
What’s the best way to transport my dress if I’m having a destination wedding?
Most airlines allow you to bring your dress as a carry-on. Use a quality garment bag and ask the flight attendants if they can hang it up during the flight.
